Supplier communication
This section describes the tools in place to facilitate additional supplier communication, especially during verification phases.

There are three main ways to communicate electronically with your suppliers:
- Comment: communication through Eftsure
- Email: communication via email sent from D365
- Direct email: outside D365FO, directly in your mail client (Outlook, GMail, ...)
Comment
The Comment feature sends user text directly to the user email used for Eftsure services by your supplier.
It's the fastest way to communicate and record messages into the Eftsure interaction history.
Select any vendor available in Eftsure, use the Eftsure menu and select Comment.

The following screen will appear:

Enter your message and hit OK to send the message to the supplier using Eftsure services.
Email
The Email feature used Dynamics 365 data and services to send an email to the supplier.
It allow the user to communicate with the supplier using different email addresses and the email history in saved into D365 email history.
Select any vendor available in Eftsure, use the Eftsure menu and select Email.

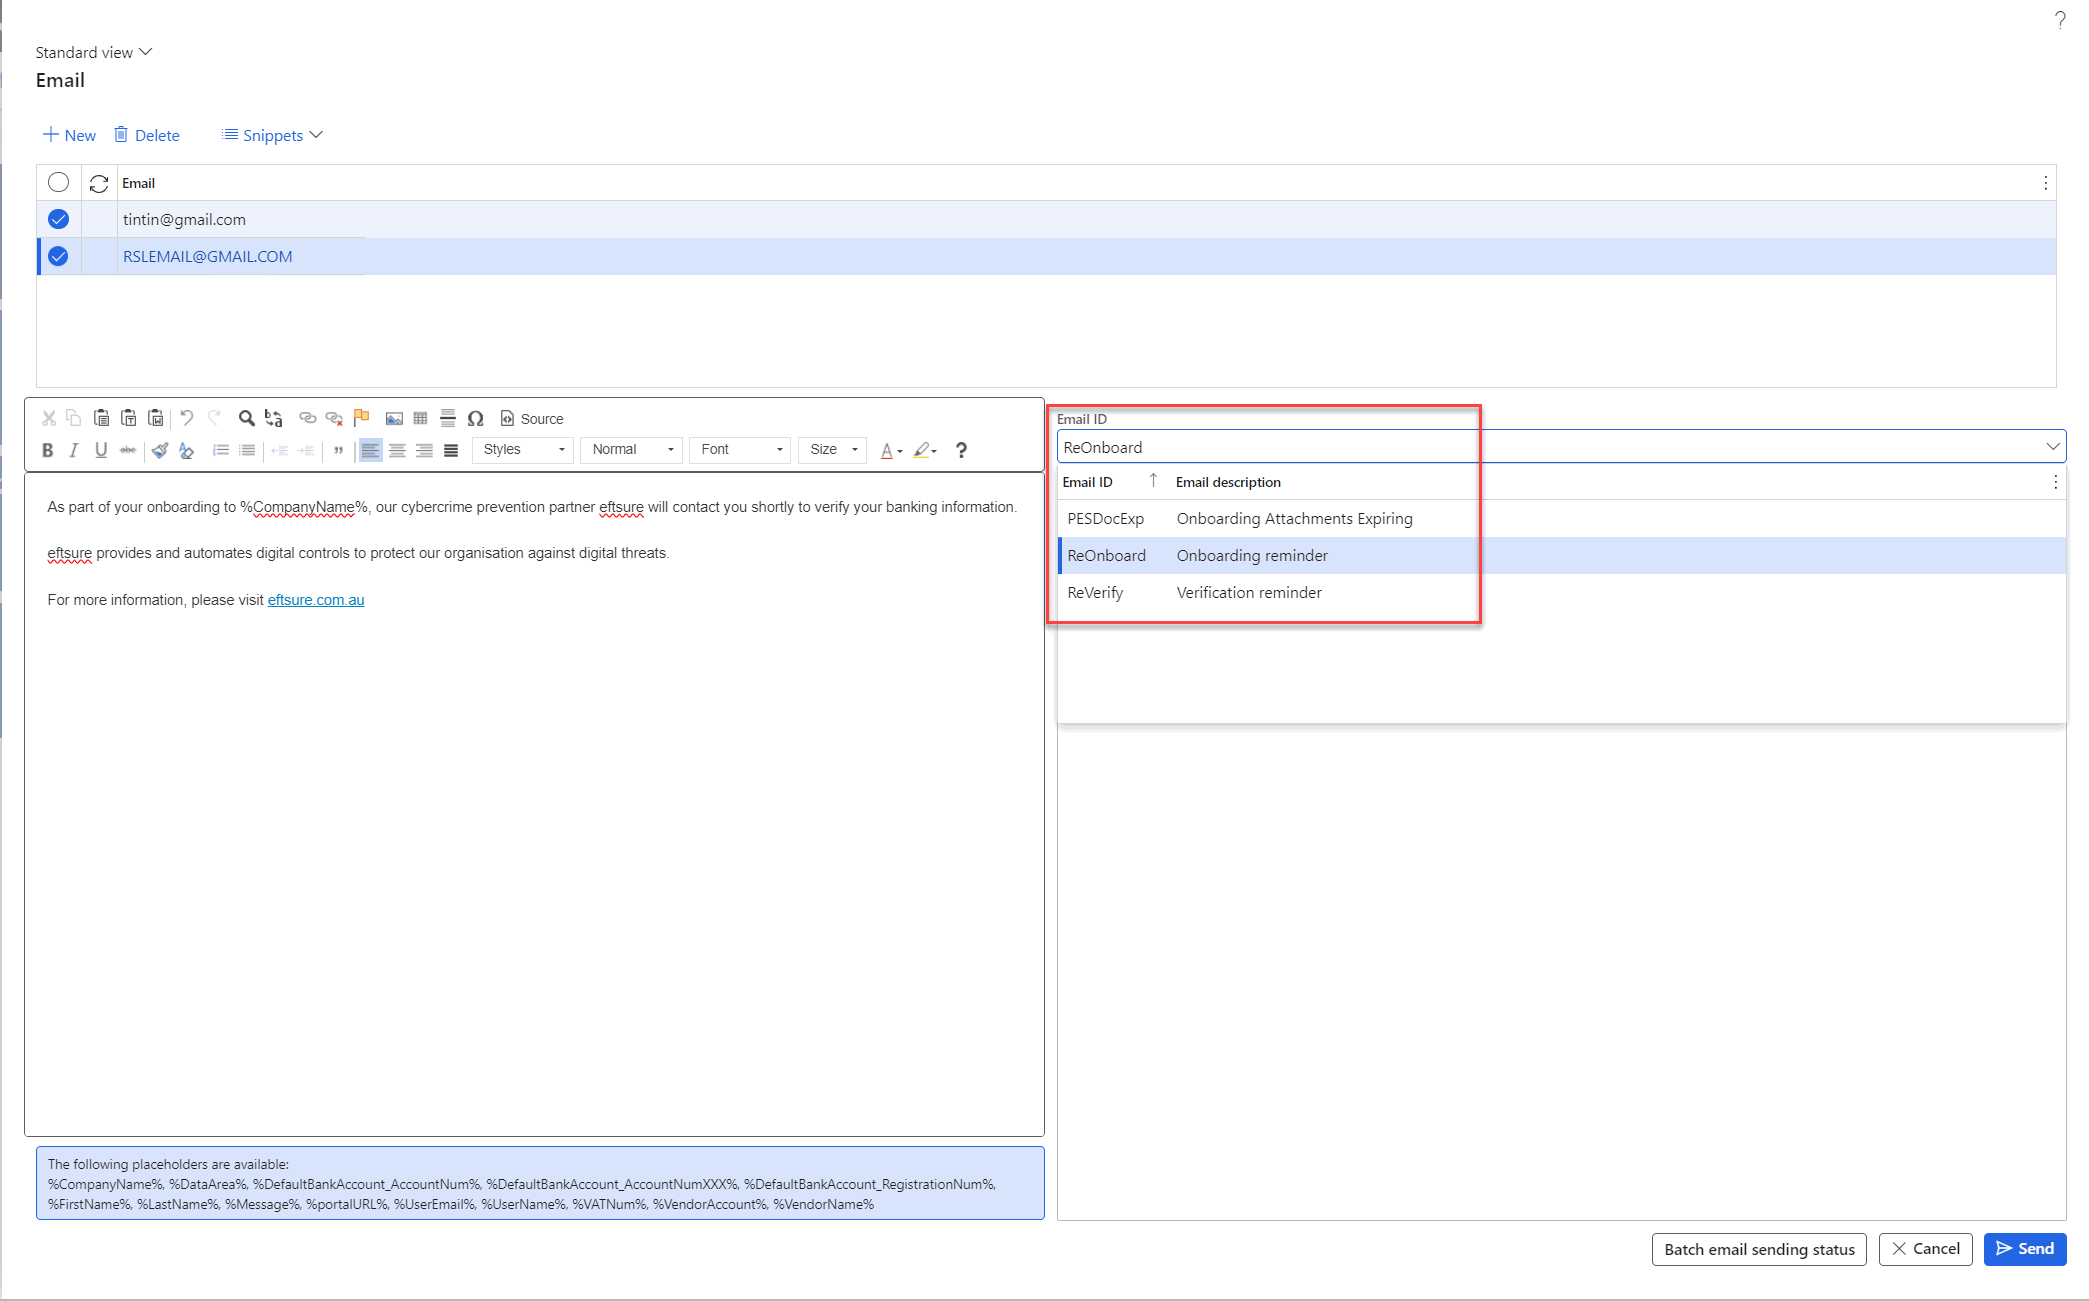
The following screen will appear:

In the top section, the user can specify the email recipients, this grid is prepopulated with the list of contacts available for this vendor.
A Snippets button is available when text snippets have been configured in Eftsure parameters > Snippets, and allows the selection faster reusable generic messages.
In the bottom left corner, enter your comments.
You can include any number of placeholders in your text.
The section in blue lists the placeholders available throughout the extension.
In the bottom right corner, select the email template you wish to use and preview the email text to be sent to the supplier.
When your message is ready, hit the Send button.
The email is added into D365 outgoing email queue, which doesn't guarantee it will be sent if your administrator hasn't enabled this feature.
Use the batch email sending status button to check the status of your email (requires permission)
For more information, see Configure email
Email body
The email body can be populated from our Parameters > Snippets.
User can create new html templates using standard New button. Sample email can be selected from Templates drop down list and content of the template can also be edited.
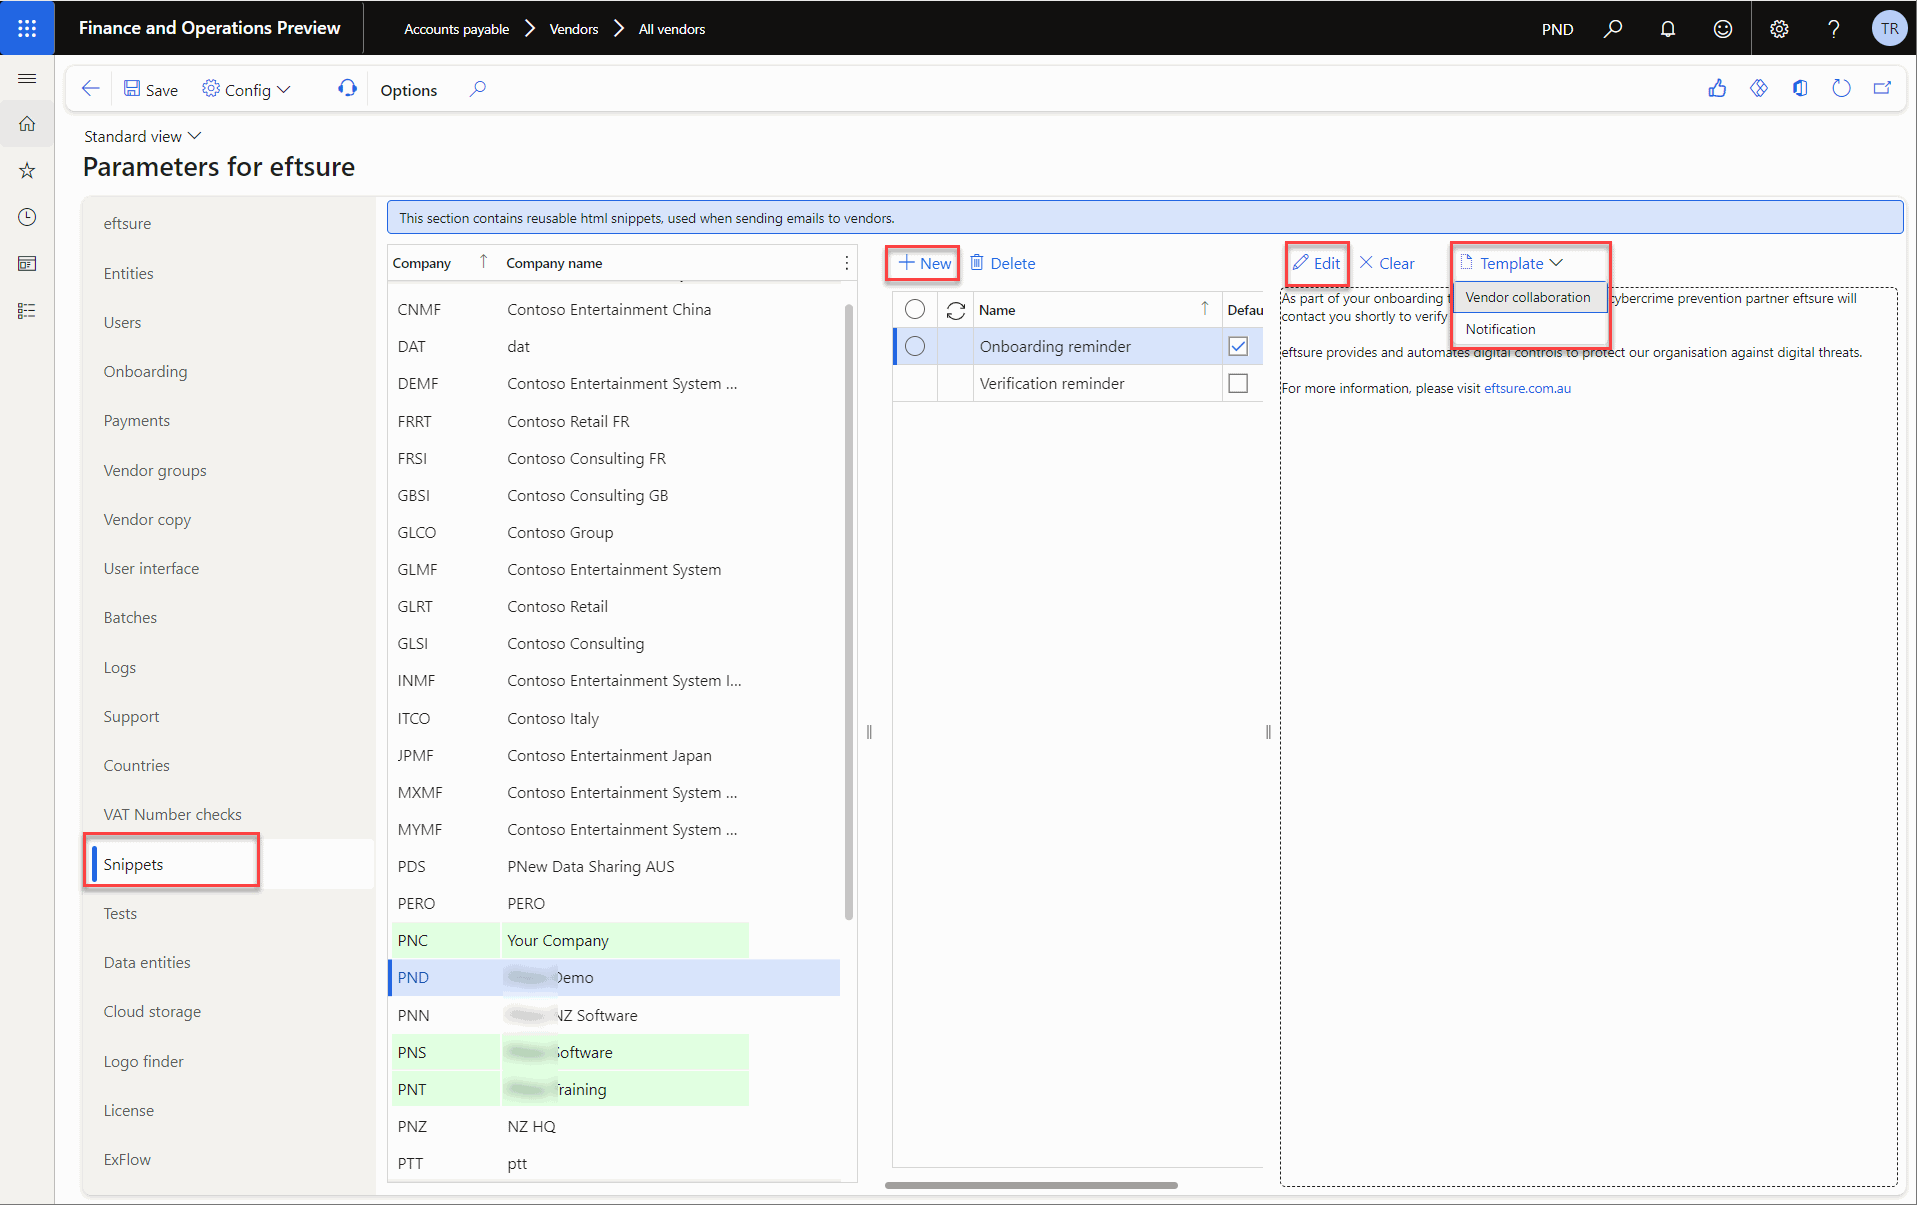
To edit the template, the user can use the left hand side window to edit the text and format. A quick previewer will be shown on the right hand side.

The following placeholders can be used for editing email body:
- %CompanyName%,
- %DataArea%,
- %DefaultBankAccount_AccountNum%,
- %DefaultBankAccount_AccountNumXXX%,
- %DefaultBankAccount_RegistrationNum%,
- %FirstName%,
- %LastName%,
- %Message%,
- %portalURL%,
- %UserEmail%,
- %UserName%,
- %VATNum%,
- %VendorAccount%,
- %VendorName%
Email Template
The next step is to setup default email note which is linked to email ID.
Please ensure to have %Message% at the end of the email if you wish to see the email body which is setup in Snippets.

Email Id
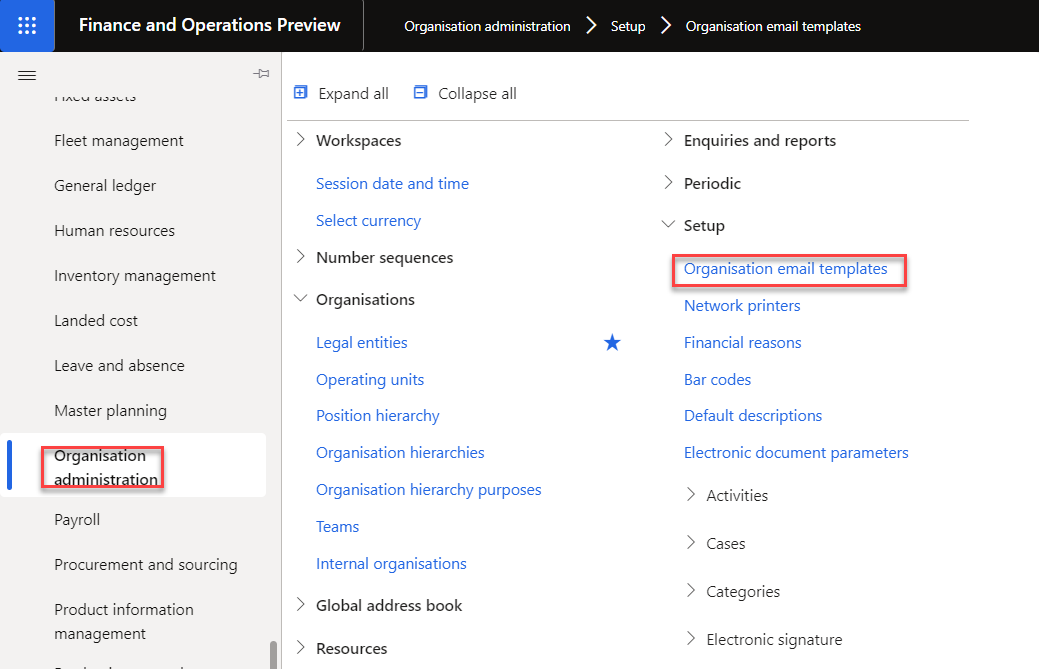
User can setup email Id from Organisation administration > Setup > Organisation email templates.
If there is no existing email Id, user can create new one dedicated to Eftsure only.

All mandatory fields will need to be filled in including Email message content.

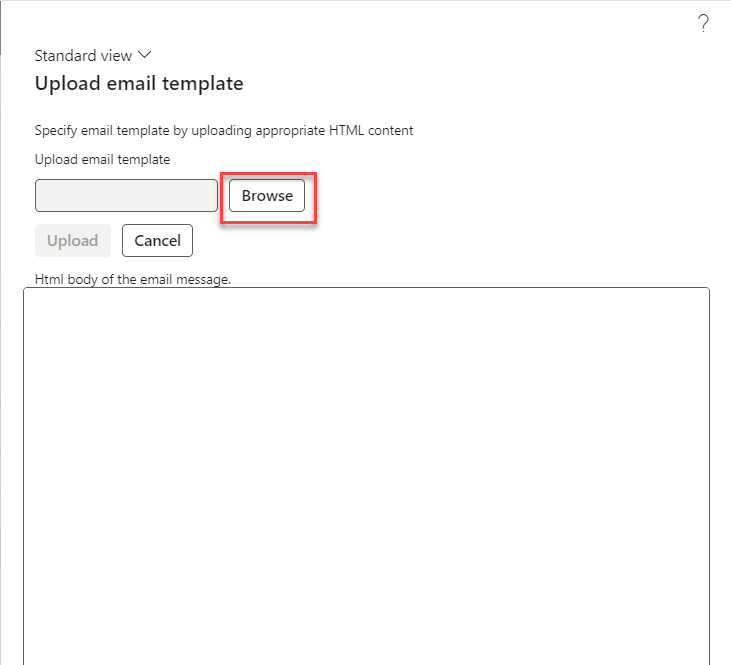
To include a default message for the email, user can use Edit button.

New window will pop up allow user to Import and Upload the saved html template.
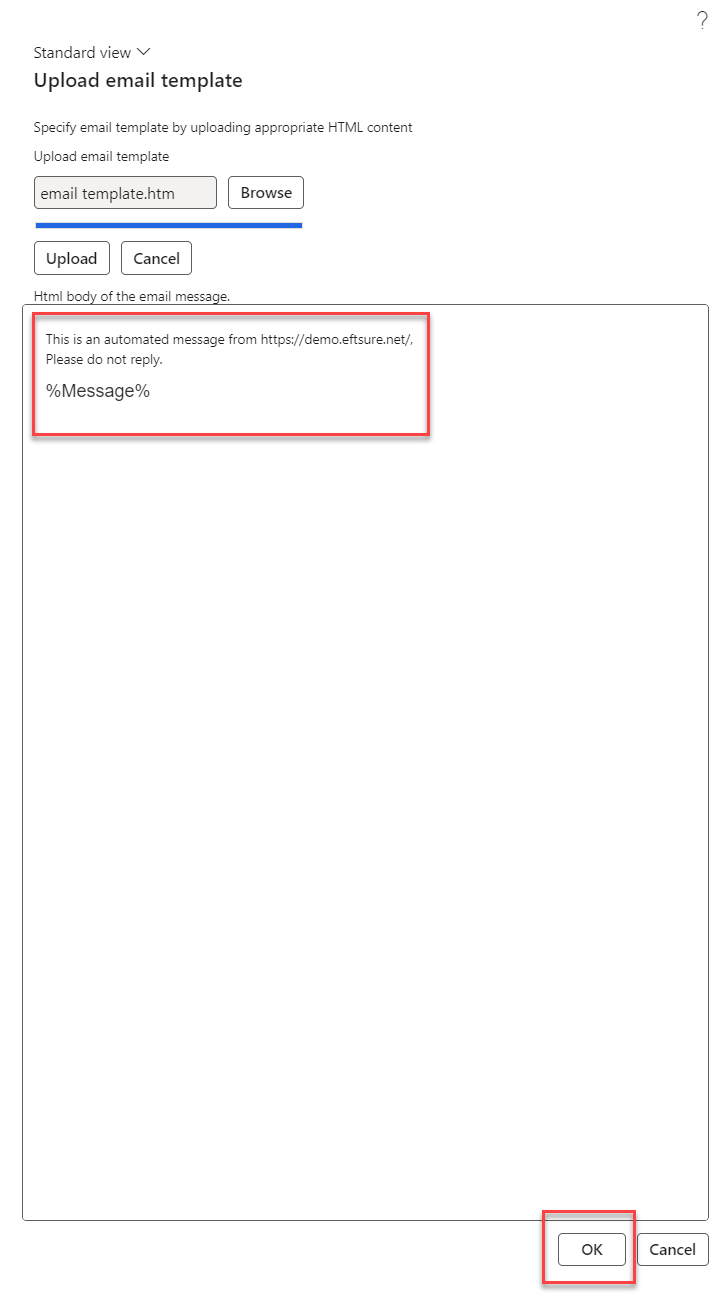
Select email template which was created in previous step Email Template.

Upload email template for review.
Email Form
Once all of the above steps have been setup correctly, to use the direct email function, please navigate to Eftsure main menu from Accessible section.
User can select Snippets template which was setup previously. The message can also be edited on the left hand side.

Existing email available in vendor master will be auto populated in email section, user can also add additional email address, once selected, all email addresses will be shown in the preview window under To section.

Email ID which was setup in previous section can also be selected from the drop down list.
If there's a default message linked to selected email ID, it will appears in the preview window with the snippet email message.
User can edit the snippet email message as required on the left window.

Once all information has been reviewed, user can click Send button to send email directly from D365 to Vendor.
Email History
User can review the history of all email which have been sent via Batch email sending status.

By clicking at Show message, user should be able to see what have been sent to the vendor.
